Introduction

A bootable USB drive is an essential tool for any computer user. Whether you need to try a new operating system (OS), repair an existing one, or recover data from a damaged PC, having a bootable USB can be a lifesaver. In this guide, we'll walk you through the process of creating a bootable USB drive using Rufus—a fast, lightweight tool that makes it easy to create bootable media.
What You'll Need
Before you begin, make sure you have the following:
- A USB drive with at least 4 GB of space (back up any important data as the drive will be formatted).
- A computer running Windows or Linux.
- A downloadable ISO image of the operating system you wish to install (e.g., Windows, Linux).
Let's outline the required content as follows and make sure that your system meets the required compatibility and system requirements.
Downloading Rufus
To start, you’ll need to download Rufus from its official website. This ensures that you get the latest, most reliable version.
There are many tools available for creating bootable USB drives, but Rufus stands out for its speed, reliability, and simplicity.
Preparing Your USB Drive
Before proceeding, make sure to back up any important data on your USB drive, as creating a bootable USB will erase everything on it. Once you’re ready:
- Insert your USB drive into your computer.
- Launch Rufus and familiarize yourself with the user interface—it’s straightforward and easy to navigate.
Selecting Your Operating System
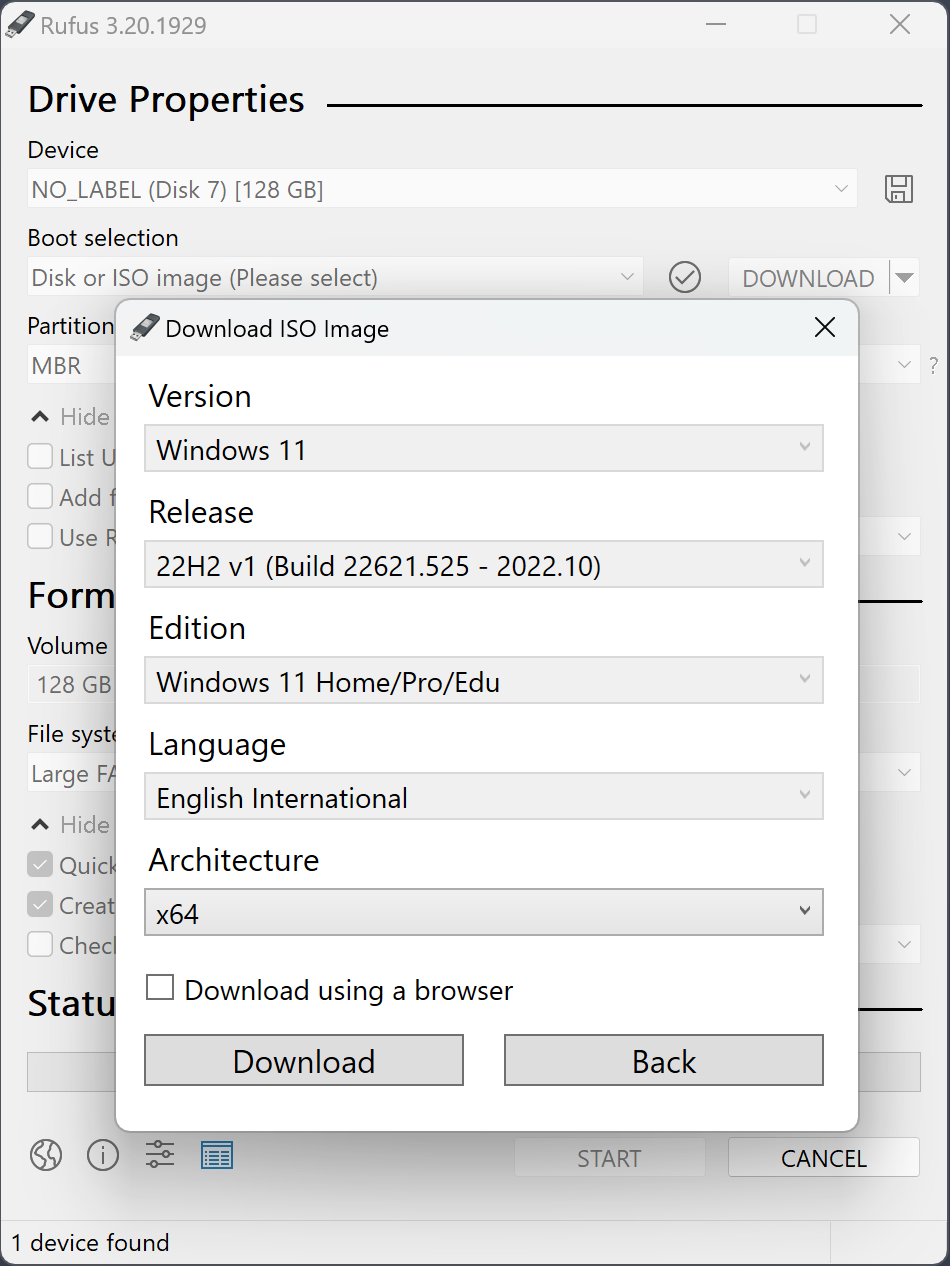
To create a bootable USB drive, you'll need to download the correct ISO file for your desired operating system. Most OS vendors offer these files on their websites. Once you've downloaded the ISO file, load it into Rufus.
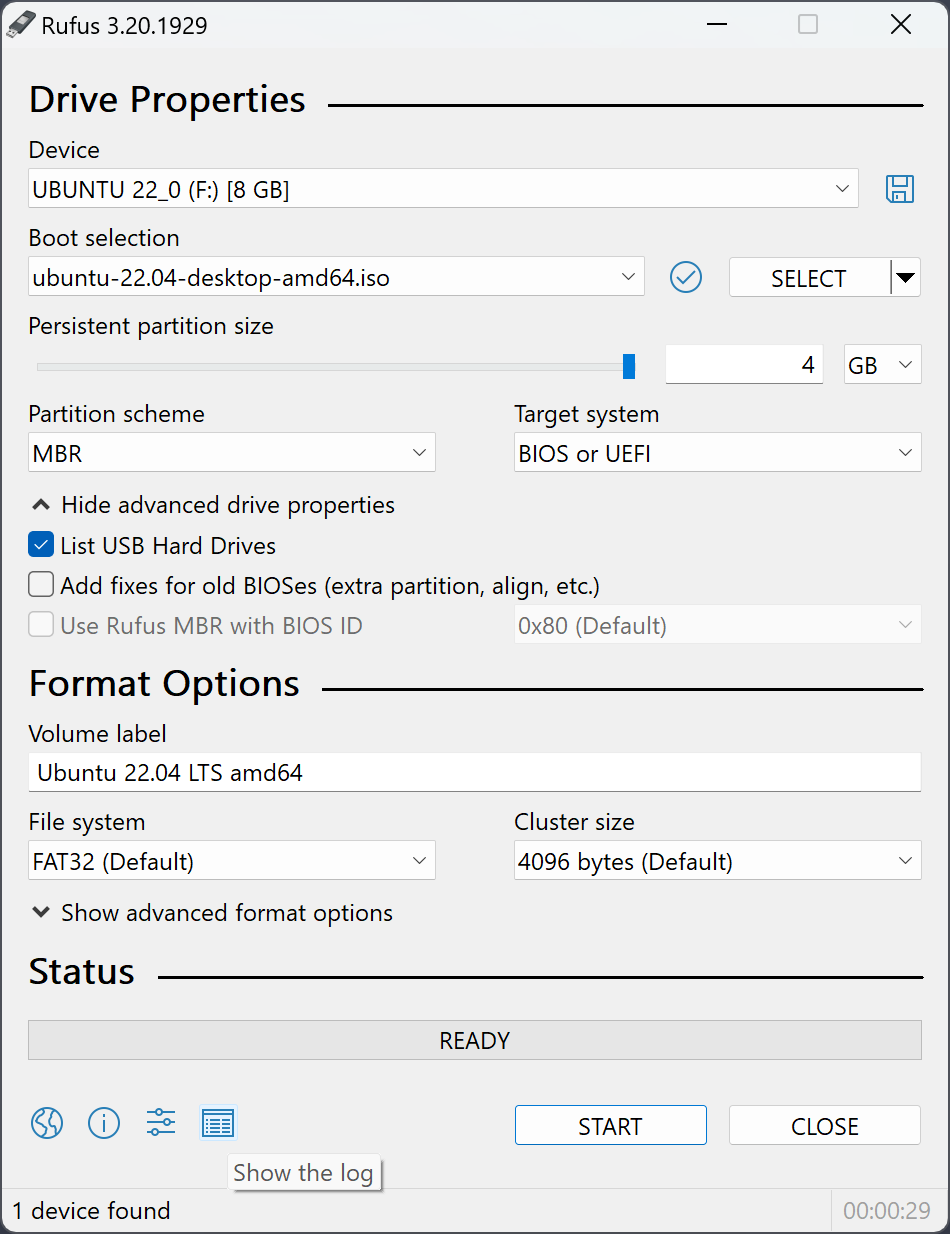
Configuring Rufus Settings
Rufus provides several settings you can customize:
- Partition Scheme: Choose between MBR or GPT based on your system requirements.
- File System: Select NTFS or FAT32 depending on the size of the OS image and compatibility.
- Cluster Size: For most users, the default settings work fine, but you can adjust as needed.
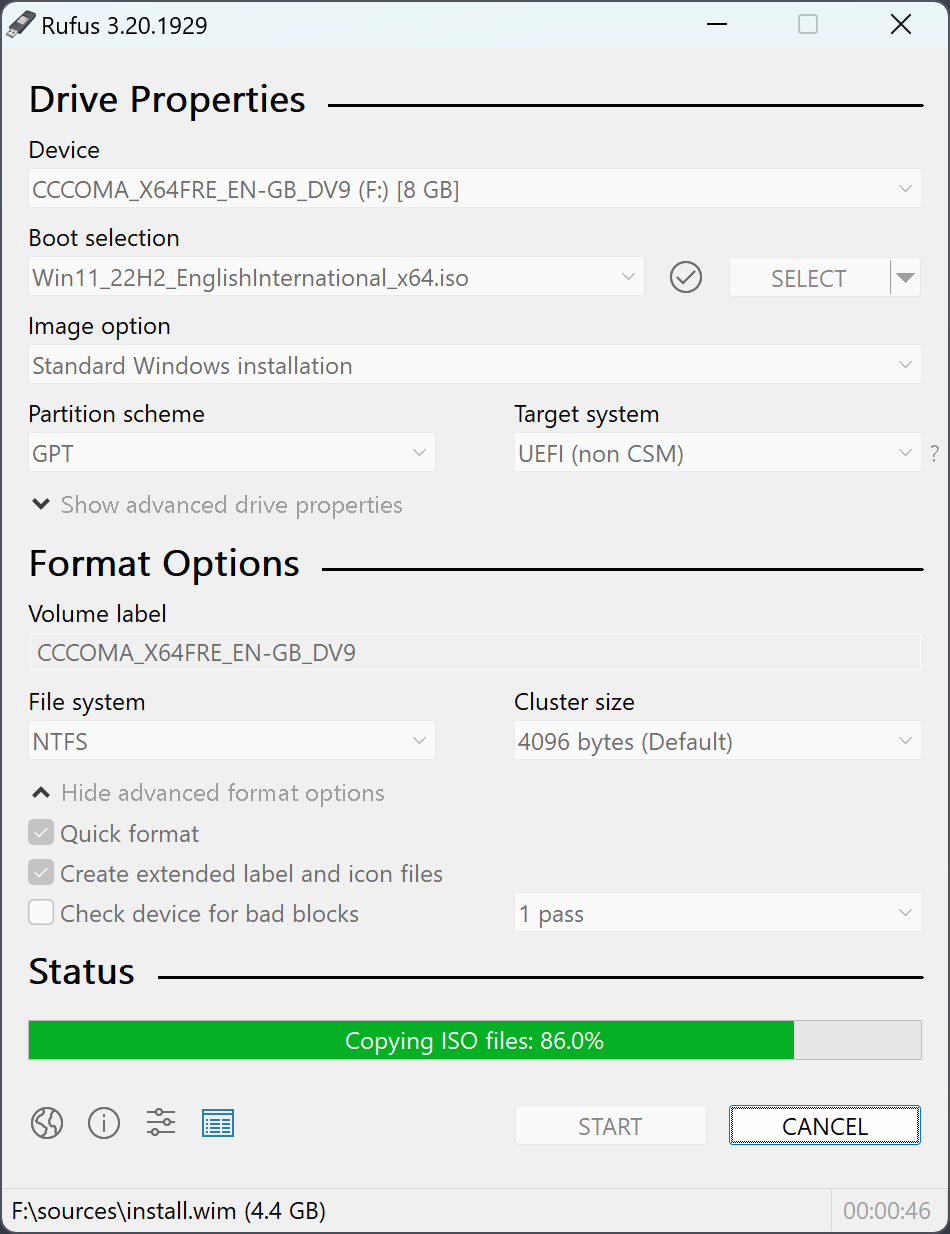
Creating the Bootable USB Drive
Once you’ve configured the settings, double-check the drive letter to ensure you’re working with the correct USB drive. Then, click Start to begin creating the bootable USB. Rufus will display a progress bar, showing you the status of the creation process.
Bootable USB Drive Is Ready
Once the process is complete, you will have a bootable USB drive ready to use. Safely eject the USB drive from your computer and verify that it's bootable by restarting your PC and attempting to boot from the USB.
Using Your Bootable USB Drive
With your bootable USB ready, you can now use it to install or repair your operating system. Here’s a brief overview of how to boot from the USB:
- Restart your computer.
- Access the BIOS or UEFI settings (usually by pressing F2, DEL, or ESC during startup).
- Change the boot order to prioritize the USB drive.
- Save and exit the BIOS setup, and your computer should boot from the USB.
If you run into any issues during the boot process, consult your motherboard's manual or the Rufus troubleshooting guide.
Conclusion
Creating a bootable USB drive using Rufus is a simple yet powerful process that grants you greater control over your system. Whether you need to try out a new OS, repair an existing one, or recover from a system crash, Rufus makes the task easy and reliable. By following the steps in this guide, you’ll be well-prepared to tackle any bootable USB task with confidence..